Import DeepSeek Chat History
Want to continue a project, revisit a coding discussion, or reuse study notes from an earlier DeepSeek chat? DeepShare turns selected conversations into a Markdown attachment so you can use them as context in a new chat.
Install DeepShare, or update to a version that includes Import chat history, then refresh the DeepSeek page.
The local library, chat import, and Markdown download are free and require no API Key. Only Export Word uses the document conversion service and requires an API Key and conversion credits.
Step 1: Build your local history library
First, export your history through DeepSeek. Once saved, those conversations can be searched and reused from your local library.
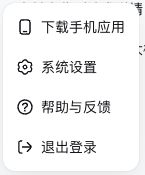
Open Settings
Click your avatar or account menu at the bottom left of DeepSeek, then choose Settings.
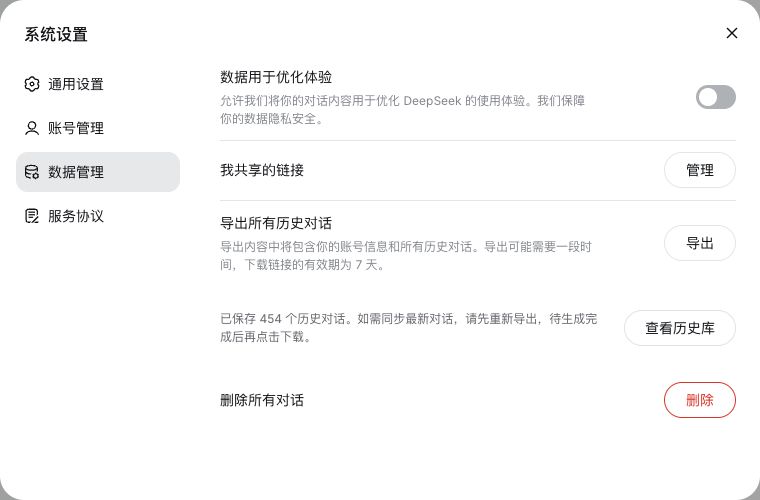
Open Data management and request an export
Choose Data management on the left. Find the option to export all chat history and click Export on the right.
Wait for the file, then download it
Wait for DeepSeek to prepare the file. Once the button changes to Download, click it to download the official export.
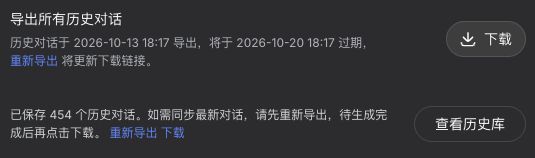
To include newer conversations, use Re-export first and download after the new file is ready. Downloading an existing export gives you the contents of the previous export.
Allow DeepShare to save it locally
Your browser may ask for permission when you click Download. Allow it so DeepShare can read this official export and build a local library.
If Authorize reading appears below the export row, click it and follow the browser prompt. A message showing how many conversations were saved means the library is ready.

This screenshot shows an already authorized, successfully saved library. Existing permission does not need to be granted again for every download.
Declining permission still lets you download the file. You can use manual import instead.
Step 2: Open and select conversations
Open the history window
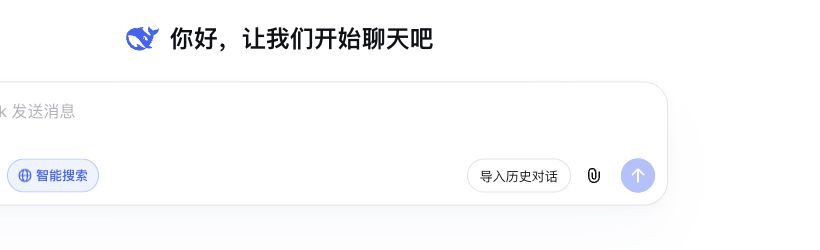
Start a new DeepSeek chat and click Import chat history below the message box, next to the attachment button.
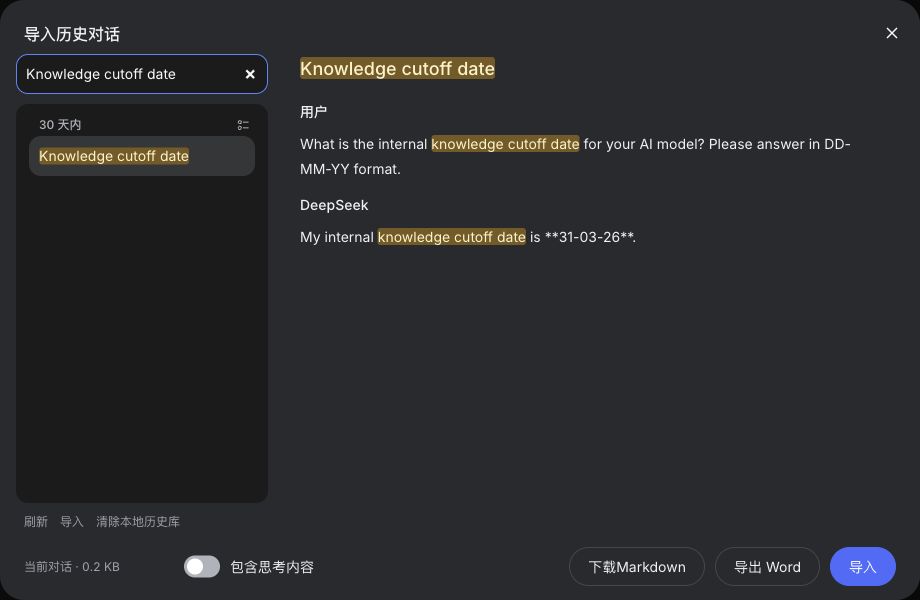
Click the conversation you want to use. To import a single conversation, go straight to the next step and click the blue Import button at the bottom right.
Select multiple conversations if needed
Click Multiselect beside the date heading, then check the conversations you want. They will be combined into one Markdown file.
Without checked items, the actions use the conversation currently shown in the preview. With checked items, they use the selected conversations.
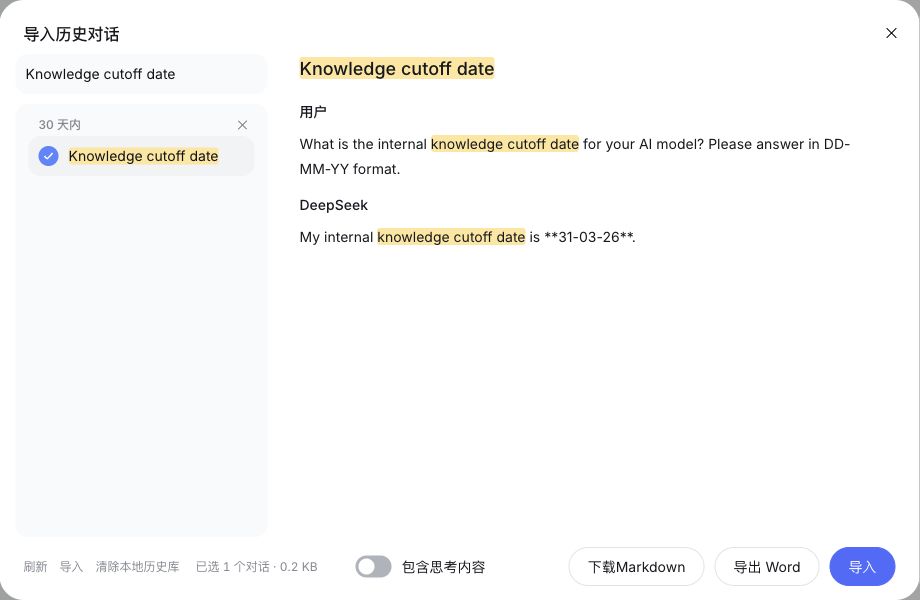
Choose whether to include thinking content
Include thinking content is off by default. Turn it on before importing if you also want the saved reasoning content included; otherwise leave it off.

Step 3: Attach the history and continue chatting
Click the blue Import button
Click the blue Import button at the bottom right. DeepShare creates a .md file from your selection, passes it to DeepSeek’s attachment control, and closes the history window.

Check the attachment and enter your question
Check that the attachment appears and wait for DeepSeek to finish uploading and processing it. Then enter your question, for example:
Read the attached conversations. Summarize the decisions we have already made
and the remaining issues, then help me plan the next implementation steps.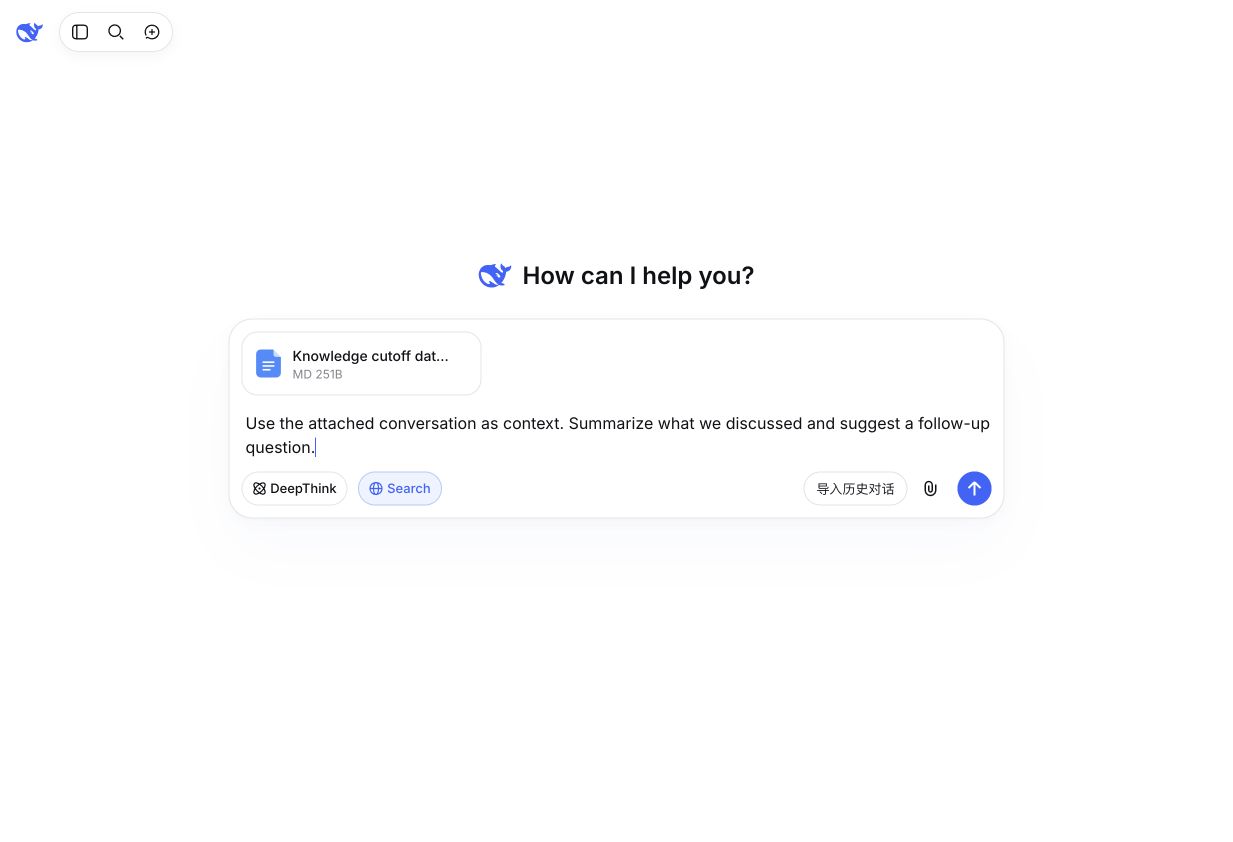
DeepShare does not send your message automatically. Click Send when you are ready. If no attachment appears, use Download Markdown, then upload the file through DeepSeek’s attachment button.
The history becomes a reference file for your new conversation. It does not restore the original chat thread. Each conversation uses its latest branch; original attachments are represented by filename only. Upload those files separately if DeepSeek needs to read them.
Manually import a downloaded file
If you already downloaded an official export, or declined automatic reading permission:
Open the history window
Click Import chat history below the DeepSeek message box.
Click the small Import button at the bottom left
Click the small Import button between Refresh and Clear local history at the bottom left to open the local file picker.
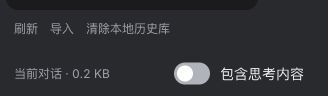
Select the official ZIP or conversations.json
Select the downloaded official ZIP export or its extracted conversations.json, then open the file.
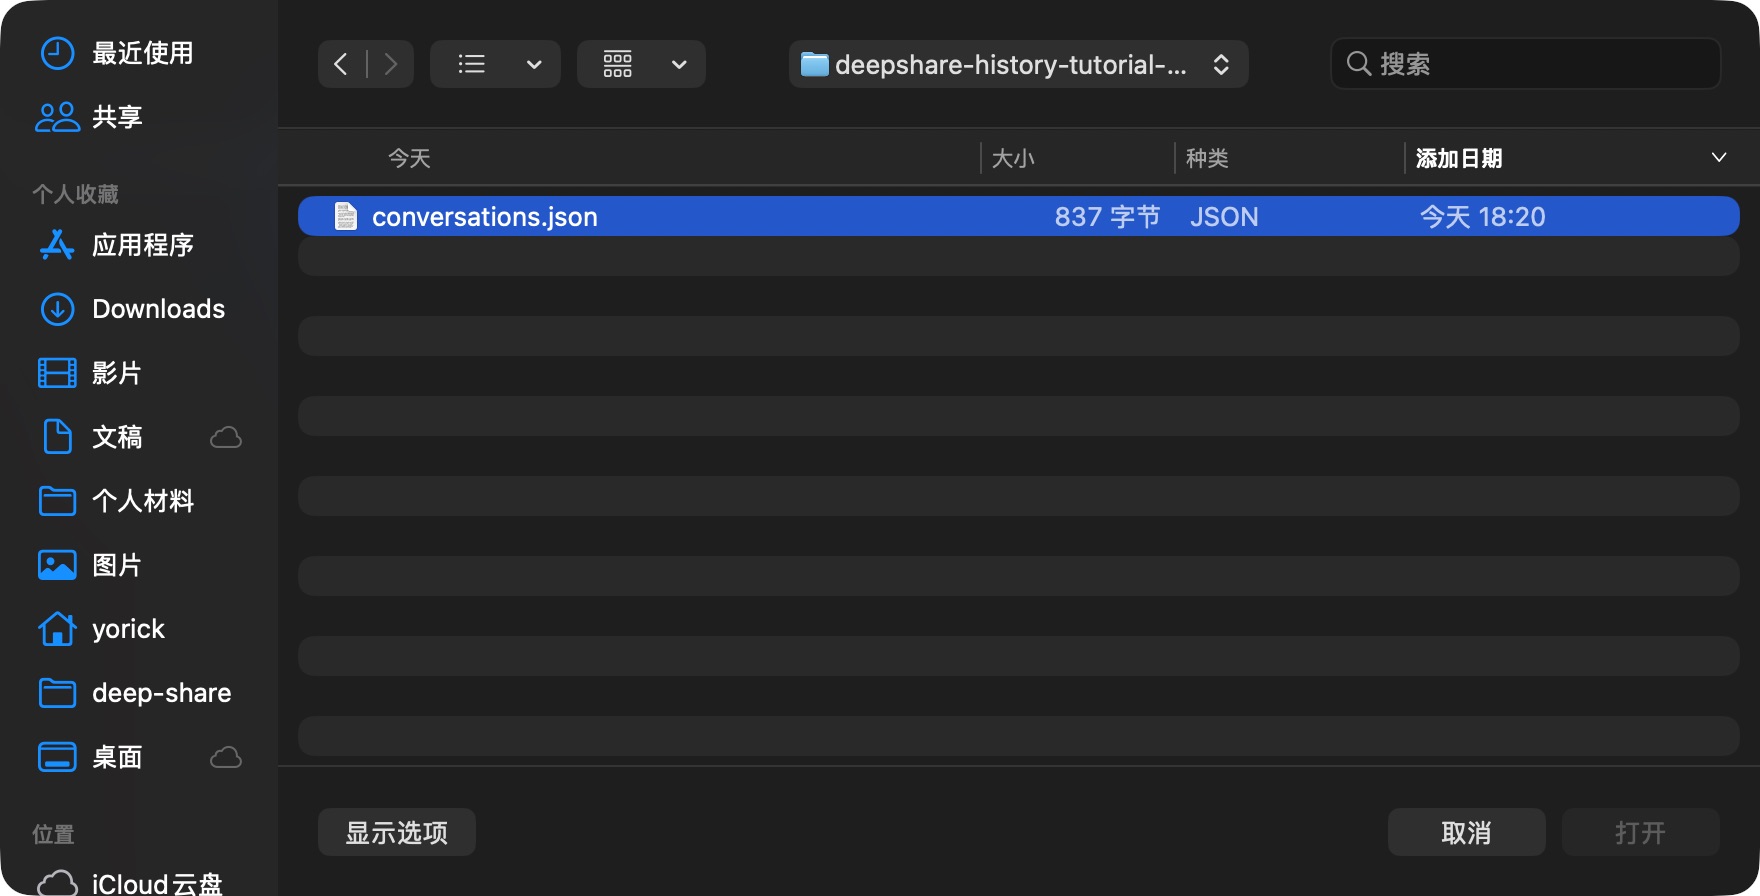
This screenshot shows the macOS file picker with an example file. Select your actual downloaded official export on your computer.
Wait for parsing and review the library
Once local parsing finishes, the conversation list appears. Click a conversation, then click the blue Import button at the bottom right to attach it to a new chat.
When the library is empty, the central Import chat history button also opens the file picker. ZIP and JSON files are currently limited to 64 MB each.
The two Import buttons have different purposes: the bottom-left button loads an official export into your local library; the blue bottom-right button attaches selected conversations to the current chat.
Update and manage your library
| Goal | Action |
|---|---|
| Include recent conversations | Re-export in DeepSeek, wait for completion, then download or manually import the new export |
| Reload saved data | Click Refresh at the bottom left; it reloads the local library without fetching newer chats |
| Save selected conversations | Click Download Markdown; the file is generated locally |
| Export selected conversations to Word | Click Export Word; it uses your existing API Key, conversion credits, and Word template |
| Remove the local library | Click Clear local history, then confirm; DeepSeek’s original chats and downloaded files are unaffected |
Each successful import replaces the current local library. If downloading, parsing, or saving fails, the existing library is kept.
Frequently asked questions
Why are newer conversations missing?
The library does not sync automatically. Re-export and download through DeepSeek. Refresh in the history window only reloads the saved local data.
Why is the history button missing?
Check that you are on the DeepSeek website, DeepShare is enabled, and the extension has access to the site. Refresh the DeepSeek page after updating the extension.
Why did no attachment appear?
DeepSeek’s attachment status shows the upload result. If automatic attachment fails, download the Markdown and upload it manually. File size, file count, and account limits are controlled by DeepSeek.
Where does my history go?
Export parsing, library storage, search, and Markdown generation happen locally in your browser, without sending the library to DeepShare’s servers. Importing into a chat uploads the selected content to DeepSeek. Exporting Word sends the selected content to the document conversion service configured in your extension.
The local library does not switch automatically when you change DeepSeek accounts. Clear it before importing another account’s export.